In a perfect world, all of the squares you are going to join together will be the same size and have the same stitch count.
But this is not a perfect world, and we do love to get creative, often using patterns from many different designers, to create beautiful blankets, afghans, throws.
Just like the Friends Around The World Cal, hosted by the Cal – Crochet A Long group on Facebook.
I am so thrilled to have been a part of this cal [crochet a long], I designed two squares for this amazing project, Desire, and Rosetta.
My Friend Laurene asked me to put some ideas together to help with the joining of the squares, especially for those of you who, maybe, are not so experienced working with and joining squares.
12-inch afghan or granny squares will have anything from 37 to 41 stitches per side on average. So how do we join them to get an even, uniform look to our work?
♥ Whenever possible change the last round or two to ensure all your squares have the same stitch count.
All of the 12-inch squares I design have a 40 stitches per side, plus corner stitch or chain space, final stitch count.
I have purposely done this to make sure all my squares can be mixed and matched, and to make it easy to use with other 12 inch squares from other designers.
If you have made any of my blanket or cushion designs, you will know that I also include full instructions for joining. To me it is part of the pattern, a vital part of the pattern!
Adding to the stitch count
This seems easy, right!
♥ Not always so, but let’s make it simple.
♥ There are two things you need to consider, the final stitch count per side, and the finished size of your squares.
♥ Remember that, hook size, yarn weight, and personal working tension will all make a difference.
♥ When I used to teach in hairdressing I had a saying that many of my students got sick to death of hearing…. “failing to prepare is preparing to fail”!
♥ So where ever possible, think of your finished result, and plan and make adjustments as you go, this will save a lot of work at the end of your project.
♥ Before you start any square, check the final stitch count, so that you can make any necessary adjustment as you make the square.
♥ As you are working, check the size of your square when you have 2 rounds remaining.
♥ To increase the size, either add another round with the extra number of stitches required or increase the height of the stitches in the final 1 or 2 rounds.
Or to decrease the height if a square is working out too large.
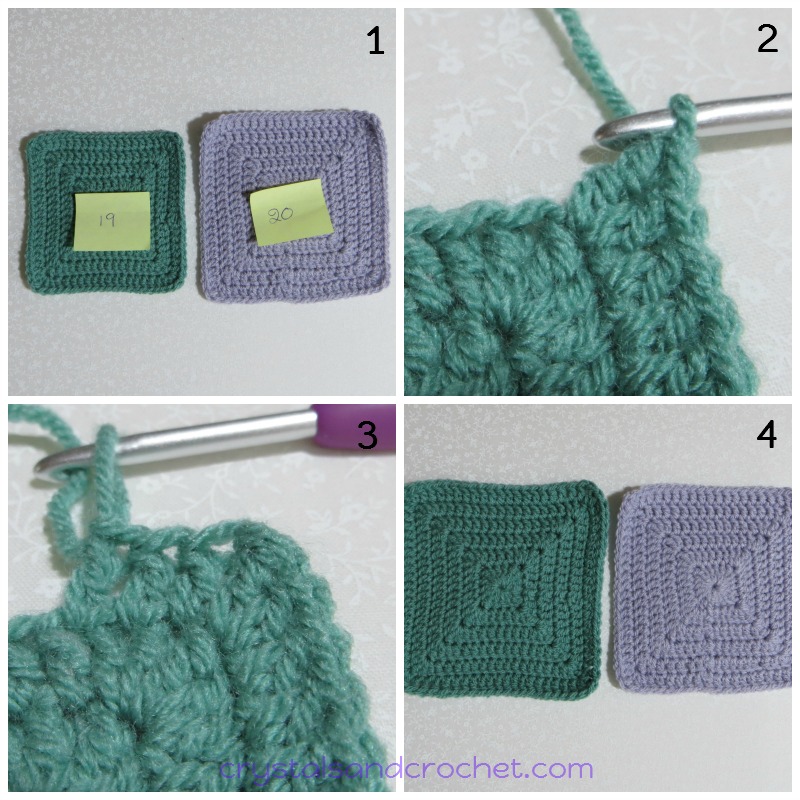
Here is an example.
Photo 1
The silver square has 20 double crochet stitches per side, plus a corner treble.
The green square has 19 double crochet stitches per side, plus a corner treble.
As you can see the green square is smaller and needs an extra round of dc to make it the same size as the silver square.
Photo 2
To increase each side by 1 stitch, we need to add 1 dc, plus a new corner tr to each side.
If we make a new corner as (dc, tr, dc) and skip the next stitch, we will have a gap.
Make the corner as (dc, tr).
Photo 3
Continue to make a dc in each stitch across.
The corner is not symmetrical, yet it looks even.
Photo 4
Both squares have the same stitch count per side, and are the same size.
Joining is now very simple.
If your square has an even number of stitches on the final round, and is the correct size, then all you need do is add in the extra stitches to the corners or add another round of single crochet, increasing by the required number of stitches in each corner.
♥ Final count 36, add into corner – 2 stitches, plus ch-2 or centre corner stitch, and 2 stitches.
E.g. (2 sc, ch 2, 2 sc).
♥ Final count 38, here you only need to add 2 stitches, (sc, ch 2, sc).
♥ If your square has an odd number of stitches, increase as above BUT…. reduce your stitch count each side by 1 stitch, by simply skipping the 1st stitch after the corner.
♥ Final count 37, add into corner 2, plus ch-2 or centre corner stitch, and 2, then skip 1 stitch.
E.g. (2 sc, ch 2, 2 sc), skip next st.
♥ Final count 39, here you only need to add 2 stitches, (sc, ch 2, sc), skip next st.
This will bring you to a final count of 40 stitches per side.
What if I have too many stitches?
I have never come across a 12-inch square with more than 41 stitches per side, but there may be some out there, especially if a lot of single crochet stitches are used.
♥ To reduce the count, simply skip the 1st stitch after the corner on the final round, and this should bring you down to 40 stitches per side.
But what if I have already made all my squares?
There are some joining techniques that are very forgiving, and will allow you to make “adjustments” as you join, by working 2 stitches together, or skipping an extra stitch.
The most important thing is to have all your corners lined up.
I always block squares as I am making them….why?
Because it makes it so much easier to join straight, flat squares, rather than trying to work on wonky, curly squares.
This next step may seem like a lot of work, but remember failing to prepare is preparing to fail!
This is only necessary if your squares have different stitch counts.
♥ Pin a small piece of paper, with the stitch count, on each square.
This will help you to work out how many stitches you will need to skip or add as you join.
Which type of join is best?
This is one of those “how long is a piece of string” type questions!
You can use ANY type of joining technique.
Some joins are sewn with a yarn needle and yarn, some are crocheted.
The choices are so varied; you can be as creative as you like.
Lacy joins, or solid joins, simple, complex, whatever you like.
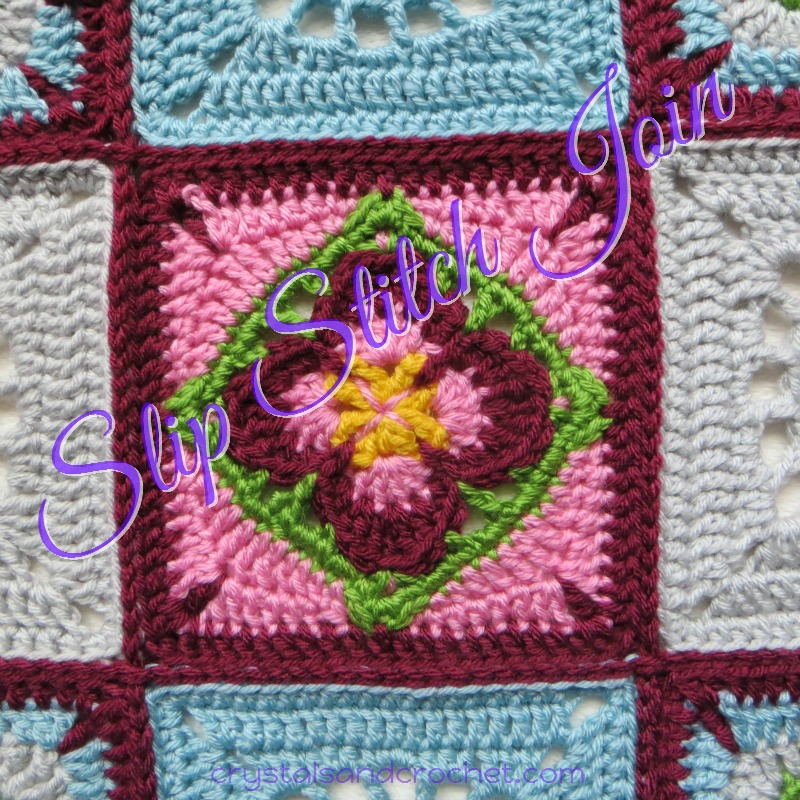
This tutorial has lots of pictures and shows all the details, especially for working over the corners.
This is one of the things I found when looking to learn new ways of joining…so many tutorials do not go in depth about how to work across the corners of squares.. now I may be a bit dense at times, but having to work it out for myself every time was getting to be a bit of a drag!
So I have tried to take the hard work out for you and make it simple.
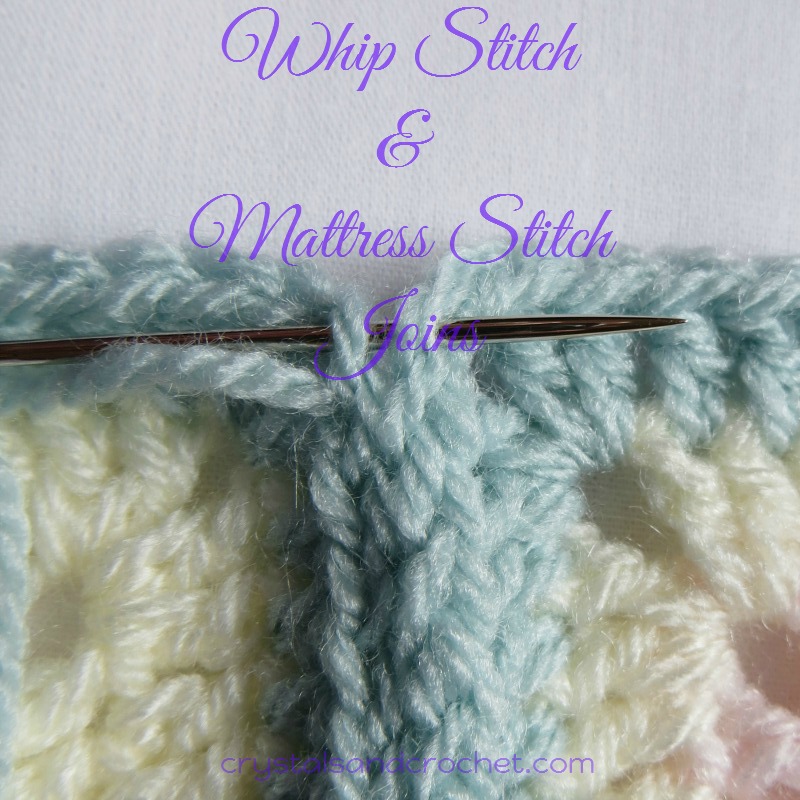
This is another type of join where there are so many different ways of doing it. Remember there is no wrong way, there is only the way that works for you. In this tutorial I have tried to show the different options so that you can choose the way that suits you best.
Again there are different ways to do this, just find the way that works for you.
Now let’s get to the nitty gritty of joining squares.
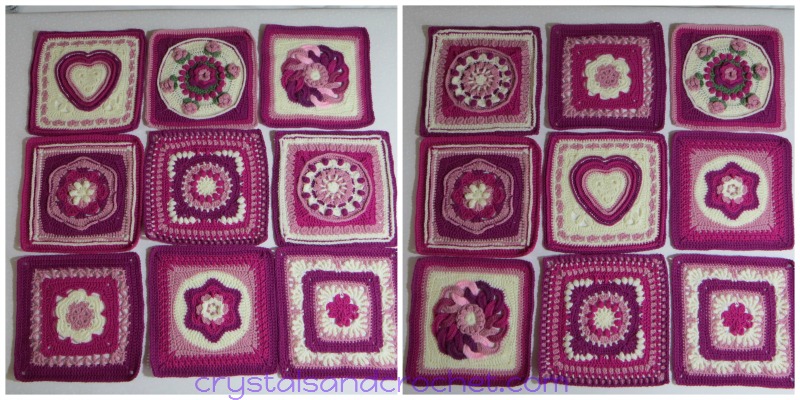
First thing to do is lay out your squares, make absolutely sure you are happy with the placement, look at how the colours blend, look at the internal shapes within the squares.
♥ Here are a couple of examples.
Which looks best to you? Which has the balance and harmony?
♥ Now you know the stitch count of each of your squares, and have marked them.
♥ Pick up your first two squares and start to join. Remember to be aware of the right or wrong sides together…there is nothing worse than standing back to admire all that work of joining to find you have one square upside down. 🙁
♥ Personally I like to work either on a table or on my bed when joining, that way I can see which squares to pick up next.
♥ Work in rows or strips, going from side to side, then work from top to bottom.
♥ Keep your tension even as you join, do not pull joins too tight, and make sure you go right to the very last corner stitch or chain space on every square.
♥ Once all of your joins are completed, work away your tail ends, and you are ready to add a border.
♥ Remember that with some joins you will need to make extra stitches in the first round of your border, to give you a flat, even edge. There are always some exceptions to this rule!
♥ I hope this has been helpful to you.
♥ Making projects with squares can be so much fun, they are easy to take around with you, you can get really creative with colours and designs. The size and shape you can create with squares is only limited by your creativity.
♥ Don’t be put off by having to join…remember “failing to prepare is preparing to fail”, have fun learning new ways to create magic with your hook. 🙂
This video tutorial has lots of hints and tips for joining squares successfully.
♥ If you need help and advice, the quickest way to find support is to join Helen’s Hookaholics Facebook group. There you will find a very supportive group of likeminded people. It’s also a great place to share your crystalsandcrochet makes, and see what others are making, and see what I am up to.
♥ If you are not a fan of Facebook you can always email me with any questions you may have by using the contact form here.
Adsense
Partners
My Recommended Suppliers
Privacy Overview
This website uses cookies so that we can provide you with the best user experience possible. Cookie information is stored in your browser and performs functions such as recognising you when you return to our website and helping our team to understand which sections of the website you find most interesting and useful.
Strictly Necessary Cookie should be enabled at all times so that we can save your preferences for cookie settings.
If you disable this cookie, we will not be able to save your preferences. This means that every time you visit this website you will need to enable or disable cookies again.